Monday, December 3, 2007

MFT Blog Candy and Tutorial

Some of you may already know that My Favorite Things (http://www.mftstamps.com/) is hosting a party on Splitcoaststampers (http://www.splitcoaststampers.com/) on Wednesday night from 9-11 p.m. EASTERN time. (Check out my previous post for more details!) Join us for lots of fun and a special gift from Kim. This month, there will be a mini set available and two new sets as well as a new line of digital papers that you can print right out of your computer---fun, fun! We will also announce how you could be the next MFT guest designer (This means that you will get all of the January releases when the design team does and get to post with the design team in January!)

To help celebrate, I am offering a design team version of the mini set "Baby It's Cold Outside" to a lucky person who posts on this entry. (The design team version is the same set without the normal packaging.)

Please number your entries and be sure to check out the MFT release party on Wednesday night!

I will be selecting a winner using random.Cara on Friday morning so post away. If you subscribe to this blog, you may post twice!!! Good luck!

Thanks again for playing---Random.Cara selected the number 16....Rae---"#16 Me again, for being a subscriber! ~rae"

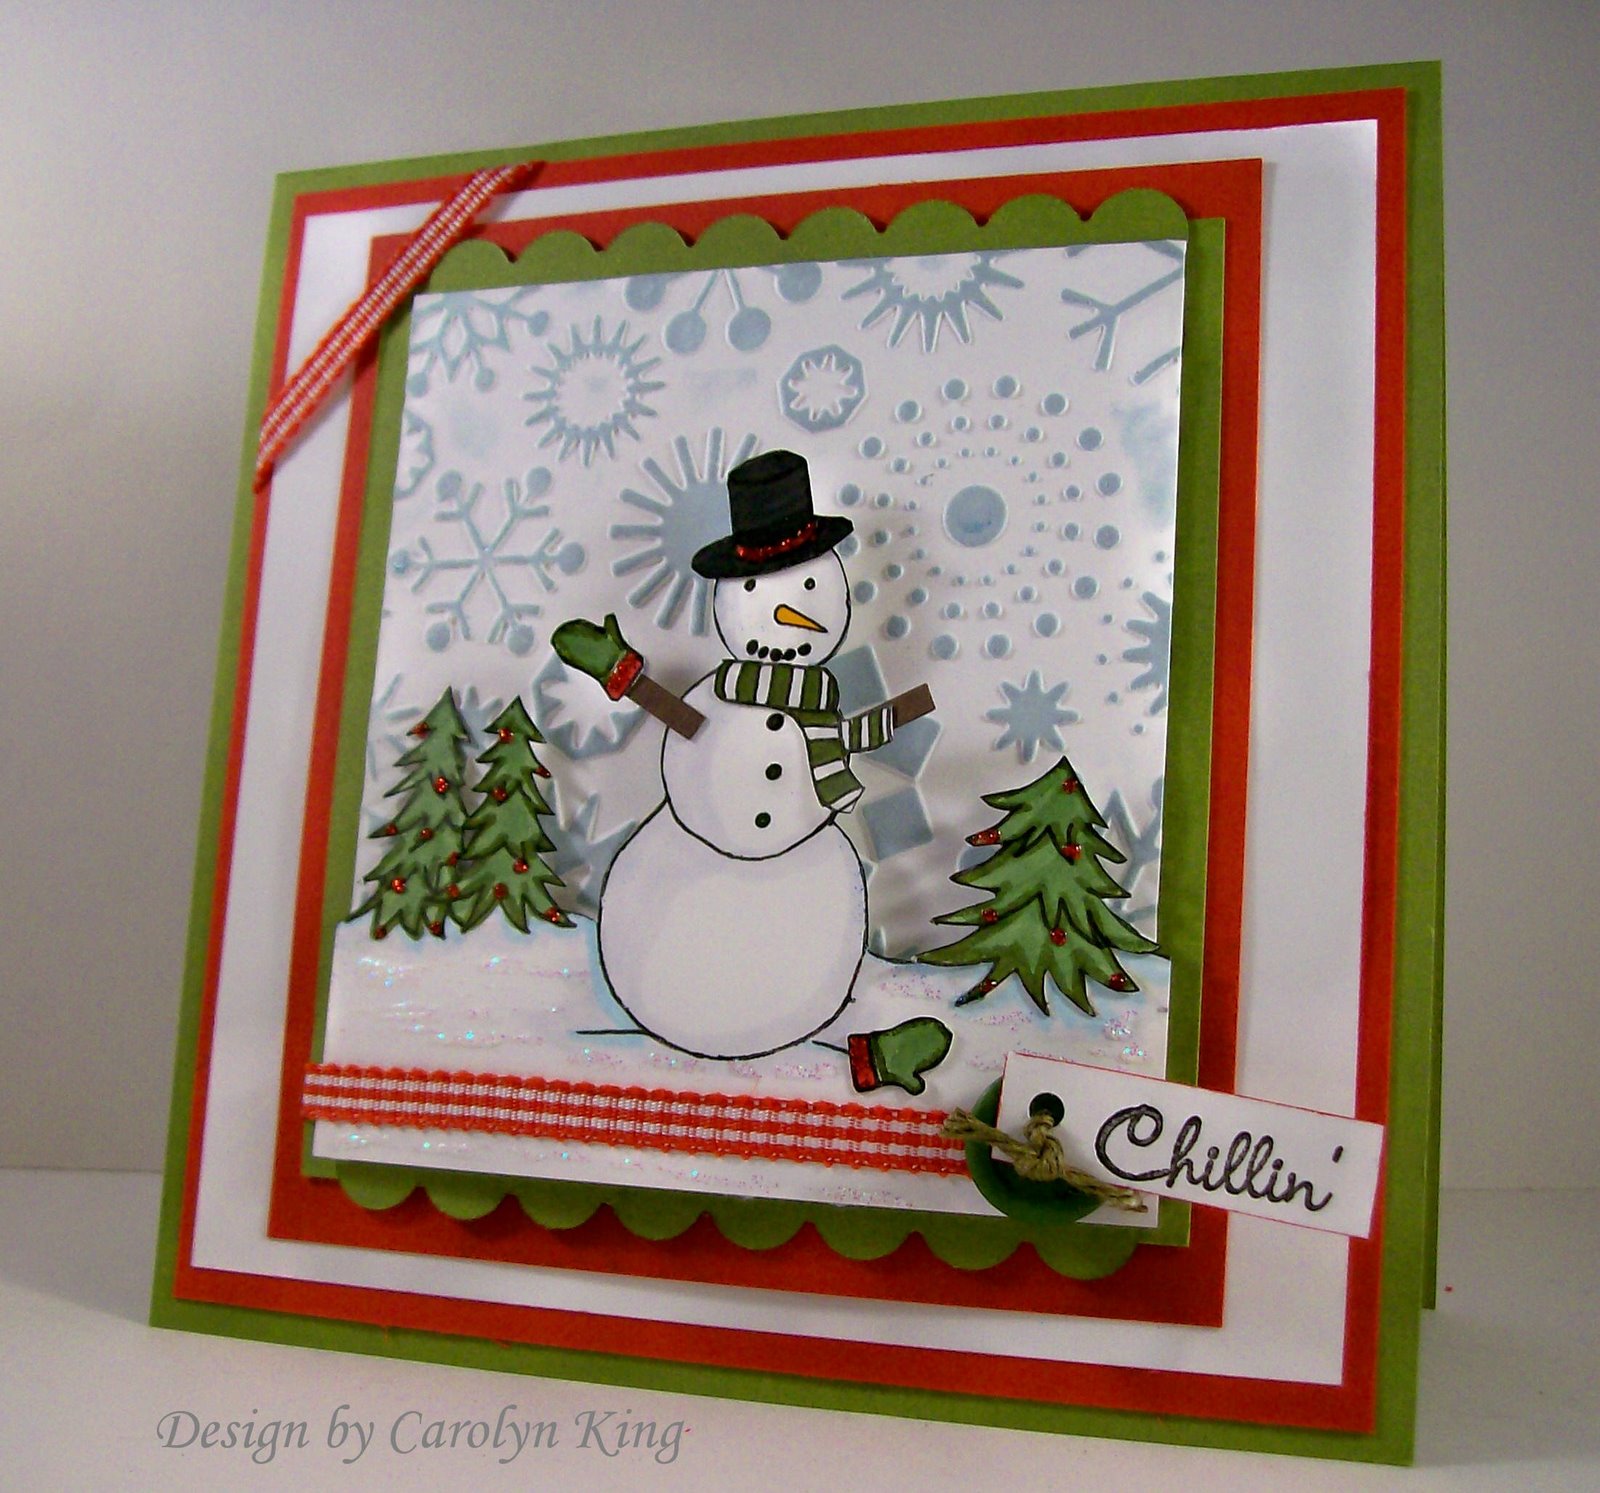
Here is another example I did using the new set called "Baby It's Cold Outside."

I wanted to show you that you can use part of the main stamp simply by using a black marker to ink up only the part you want. I chose to do a snowman card so I inked only the snowman, and then went back to add the detail that was left off. I created this little scene and here is how:

I used my cuttlebug snowflakes folder to emboss white cardstock. I then brayered blue sky (SU!) over the embossed image. I inked the snowman using a black marker and stamped on white cardstock and then filled in the parts that were cut off by the original image. I sketched the ground and a few trees and then cut around the snowman and trees. I cut a thin strip of cardstock in blue sky. (*Note, the scene piece is larger in width than the background piece--this will allow the scene to pop out!)


Then I applied tape to the middle of the strip of paper:


The blue strip was attached to the back of the scene as shown:


Then I colored the scene and added the stamped hat and gloves from the set. I added my own scarf. I also cut two thin strips of cardstock for the arms.


Next, I applied tape to the flaps of the blue strip (to wrap around the cuttlebugged background piece.) I also used two dimensionals just because I didn't want this popped out too much. If you omit this step, the scene will pop out in a nice rounded arch.


This is what it looks like when you attach it to the background:


Then I took this piece and added it to my card:


Removed for Publication
This is so simple to create and adds such neat dimension. Try it without the dimensionals for an even bigger 3D effect!
Have a great night! Thanks for stopping by!

Blog Candy Winner

Thank you to all who entered to win the Stampin' Up! set "Time Well Spent." I read each and every comment and will use all of your great ideas! Thanks so much!

The winner of the set is #101: Karen Glandney who wrote "I really enjoy your blog and I get so much for the projects that you make. I don't think that there is anything that comes to my mind that I would like to see besides the beautiful creations that you post here all the time.Have a great weekend :-)"

Karen, please email me your address so I can get this set to you.

Everyone else---don't fret---more blog candy coming tonight!!! Have a great day!

Sunday, December 2, 2007

Monday Challenge and Big MFT News


Hi everyone! It is time for my weekly challenge with my CCEE friends from Splitcoaststampers.


This week the challenge was hosted by my buddy, Cindy Haffner. She sent us a strip of patterned paper, some snowflake die cuts (which i ripped by accident so they are not on here!), tree diecuts and two sentiments. We had to use the dp, and at least two die cuts along with this image. It is from a new release called "Baby It's Cold Outside"from My Favorite Things and will be available on Wednesday night for purchase along with two other new sets.


The image is colored with copics. Then I added crystal stickles to the snow and the ground and red stickles to the scarf. I used my slit punch from Stampin' Up! to create the scalloped border along the bottom of the dp and I cut a peice of the dp off to use at the bottom of the card to help tie the design together. I used the white polka dotted ribbon to string through the sentiment. The trees and main image are on dimensionals for some depth. After I assembled the white panel, I used liquid applique for falling snow and then attached the panel to the red base.


To help kick off the new releases, My Favorite Things will be hosting a Party on Wednesday, December 5 from 9-11 p.m. Eastern time. Head over to the MFT forum on www.splitcoaststampers.com to find out all the details and join us there on Wednesday night. There will be give aways, coupon codes, a challenge and sneak peeks. Find out on Wednesday how you can become a MFT Guest Designer. It is gonna be a fun time. Hope you can make it!


Materials used: stamps-MFT-Baby It's Cold Outside; paper-white, red, dp; diecuts (?); ribbon (May Arts); snowflake punch (Martha Stewart); stickles-red, ice blue, crystal; glitter white brads; white gel pen (SU!); liquid applique (Marvy); Copics; slit punch (SU!); dimensionals (SU!); Corner punch (SU!).


I will announce the winner of the blog candy tomorrow morning! Then be sure to pop back in because I have more blog candy to give away to help kick off the new MFT releases!


Night!

Saturday, December 1, 2007

Featured Stamper


I created this card for the featured stamper challenge on Splitcoaststampers. This week the featured stamper is RoseAnn (CuttersCallous on SCS!) She created a beautiful card that you can see here.
I used the same main stamp by Flourishes but changed the sentiment. I also rotated the sketch to make a horizontal vs vertical card.
Thanks for the great inspiration RoseAnn. Hope it did your card justice!
Materials used: Stamps-Flourishes; cardstock-ruby red, white, choc chip, basic grey; ink-black, red; gold embossing powder; versamark; heat tool; ribbon (May Arts); stickles-red; satura stardust pen; Copic markers.
One more day to post for the blog candy!!! And lots of fun news coming soon!

Mitten Gift Card Holder

We were putting up our Christmas decorations this morning and one of the outside decorations is a metal snowman with cute little mittens slung around his neck.

I thought that the mittens were cute and wanted to see if I could create a mitten that would hold hot chocolate, a little pack of marshmallows and a gift card.

This is what I came up with. It was fun and very easy to do once I figured out a design.


I cut the mitten shape (making sure that a pack of hot chocolate could fit through the top. Then, I used a paper piercing tool to mark the places around the edge of the mitten that I wanted to make larger holes to thread the yarn through. Before punching the eyelet holes, I stamped Flannel Plaid (Stampin' Up!) on the shape. Then, I used the holes I pierced as a guide to punch eyelet holes and threaded white yarn through the openings.
I used the slit punch from Stampin' Up! to create the top of the mitten. I punched a heart from thin cork paper (TAC) and added a button and a circle and scalloped circle behind it. White gel pen was used for the detail. I wrapped a piece of white yarn around the top of the mitten and attached red pom poms to the end with glue dots.
The mini marshmallows are in a clear card protector sleeve. I created a topper and used My Favorite Things sentiment to complete the look. There is ample room for the gift card to be tucked inside the mitten too.
Materials used: Stamps (sentiment--My Favorite Things (Home for the Holidays) Flannel Plaid (Stampin Up!)); ink- olive, red; cardstock-white, red, olive; pom poms; white yarn; circle scallop punch (Stampin' Up!); circle punch (SU!); cork paper (TAC); button (SU!); thread; slit punch (Stampin' Up!); clear envelope; white gel pen (SU!); glue dots; paper piercer; eyelet setter.
***I have to run out and get a color cartridge for my printer today because My Favorite Things has released digital papers on their site (http://www.mftstamps.com/). They are available to everyone now so you can go check them out---it is blowing my mind that I will be able to print my own decorative paper from my own printer. Yippeee skippeee!!! Off to the store!
Thanks for stopping by! There is still time to enter---Blog candy winner will be posted tomorrow night.