Showing posts with label Cardmaker. Show all posts

Wednesday, April 24, 2013

Cardmaker Magazine Spring Parade Blog Hop


Hello! Happy Wednesday:)  Today, the Cardmaker blog team and the Gina K. team are joining forces to share projects created with the Spring Parade Stamp TV Kit (by Gina K Designs).

You should have landed here from the awesome Beth's blog, if not, you might want to start at the beginning at the Cardmaker blog. (Full hop list below!)

Gina will be giving away a $50.00 gift certificate for one lucky commenter from her blog.  So be sure to hop on through and leave a little love along the way!

Here are my projects using the fabulous stamps from this kit: two cards and a tiny little gift card that could tie onto a gift bag.


Next stop, is my amazing friend, Melanie!

Here is the full blog hop list just in case you get lost along the way:


Thanks for stopping by!

Sunday, April 7, 2013

Did you see?

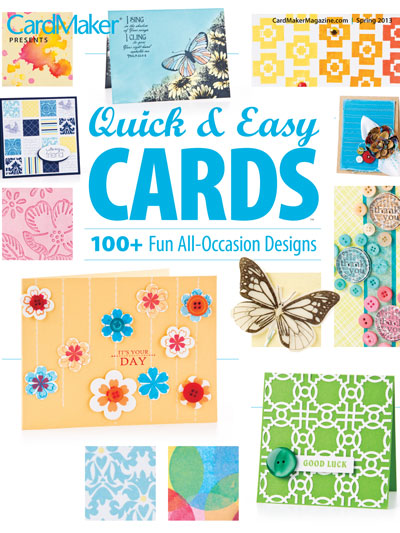
...this special issue from Cardmaker Magazine---Quick and Easy Cards?  I am very excited to get my copy as I have lots of cards in this one and lots of my friends are in it too:)
 Psst...I spy two of my cards peeked on the front cover and also one from my friend, Melanie :)

Here is one of my cards from the book:
You can find this issue at your local newsstand or HERE!  Thanks, Cardmaker, for the great honor!
Thanks for stopping by!

Tuesday, January 1, 2013

Seasons Givings Blog Hop


Hello! 
Welcome to the Seasons Givings Blog Hop!  This hop is going to be a little bit different---every single person on the list below is giving something away.  All you need to do is go to each blog and leave a comment.  Really, really easy.  Now grab a cup of coffee, or tea, or maybe some hot chocolate, whatever your favorite is, and start hopping.  
Here is to starting off the year 2013 in a fun way!

Since the New Year is a time of reflection, I thought I would look back over the past year and share a few of my favorite design team projects from 2012! 

Gina K Designs:


SRM Stickers:


 The Twinery:


Cardmaker Magazine Blog team:


I have been so blessed to work with some fantastic companies this year!  Cannot wait to see what 2013 has in store!
My Prize:  I thought it would be fun to give away a Valentine's themed prize since that is the next big paper crafting holiday.  So.....I picked this fun collection from Bo Bunny --- Love Letters.  The winner will receive the 6 by 6 paper pad and Coordinating Love Letters Buttons--

How to Enter:  Just leave a comment on this blog post by Friday, January 4 at 8:00 a.m. EST!  Random.Cara will select a winner. The winner will have three days to email me their address before I pick a new winner.  Good luck!
Blog list:


Kim Hughes/Paper Smooches


HAPPY NEW YEAR! Have fun hopping!

Thursday, November 29, 2012

Cardmaker - A Fond Farewell

About a year ago, Cardmaker Magazine started a Blog team.  I was asked to serve on the first 3 month term along with several of my stamping idols.  That three month term turned into year :)  Now, it is time for some new faces to take over and I am so excited for them because this was such an amazing journey.

Special thanks to Tanya, Brooke and Corene---I have enjoyed every minute of this adventure--thanks so much for putting your faith in me.  xo

To my fellow retiring teammates-- Colleen, Trudy, Kimberly, Anya -- you gals are fantastic and inspire me so much.  xo

To the newer members of the team--Glenda and Jennie---I loved working with you two!! You are both so talented and I know that the new members will LOVE working with you too.

...... and To the new ones who will be announced soon (!) ..... --- Enjoy every minute of it.  Cannot wait to see all your inspiring ideas on the blog.  xo

Signing off with a few of my favorite Cardmaker projects from this past year:


Thanks for stopping by!

Wednesday, November 28, 2012

Cardmaker Flower Soft Animals Hop

Hello! I am very excited today because the Cardmaker blog team is paring up with the Flower Soft team for our blog hop today. The theme is Flower Soft animals---create any type of animal-themed card incorporating Flower Soft into the design.

If following the hop, you should have come from the amazing Jen's blog.  If not, head on over to the Cardmaker blog to start at the beginning.

For my card today, I used a Silhouette image of a penguin (by Lori Whitlock) and I ran the base of the penguin through my Xyron Creative Station to make it sticky before adding the Ultra Fine Black Flower Soft to add texture to him.  It worked like a dream.  I also added some Bright Orange Flower Soft to his feet and beak to add some more fun texture.  (You can see in the photo that the ultra fine is not as textured as the regular flower soft.)

I added the image to my card to make a whimsical holiday greeting:


The next stop on the hop is Cibele's wonderful blog.
Thanks to Flower Soft for sponsoring today's blog hop! You can find lots of ways to use this product on the Flower Soft blog!  Enjoy!

Thanks for stopping by!

Friday, November 9, 2012

Cardmaker Blog Team - Xyron Blog Hop

Hello! It is time for another Cardmaker Blog Hop.  The Cardmaker girls received some awesome products from Xyron.  Thanks Xyron!  So we are having a blog hop today to show off the cards we made.

Here are the Xyron Products I used on my projects today: 
the Creative Station: this product blows my mind!
 
the Mega Runner: the best tape runner I have used


Creative Station---> Since I am a figure-it-out-yourself-and-if-you-run-into-problems-look-for-a-video kind of person :), I found a great video on how to use the Creative Station on the Xyron Video page.  It is a cinch!  You can also find wonderful ideas and inspiration on their Blog.

My machine came loaded with permanent adhesive inside.  Just place the item you want to make sticky all the way into the machine (as shown), crank the handle clock-wise and the items come out the other side.  When they come through the back, press the clear bracket down and slide the blade across to cut the paper. (NOTE: The paper will be sticky on the back so always put the side you want to be sticky facing down into the machine.)


Then you end up with something that looks like this:
All you do from this point is use a bone folder or press over every area of the image to ensure you will get the sticky on every part and then peel the clear film off and you  have die cuts that are sticky!  This is HUGE for someone like me (who uses a lot of intricate die cuts and uses my Silhouette machine non-stop!)

But, with this same machine you can change out the Permanent Adhesive cartridge to add in a Repositional Adhesive, a Magnet backer (great for creating magnets from photos); a Laminate Cartridge, and a Laminate/ Permanent Adhesive Cartridge (which has laminate on top and the adhesive on bottom.) Love that!

Here are a few projects I made with the Xyron products:
For the first one, I used the smooth-as-butter Mega runner to add paper to a chipboard tag.  To create the glittery ornament, I die cut it using my Silhouette machine (Ornament Set: Samantha Walker).  Then, I took the ornate cut and ran it through my Creative Station to apply adhesive to the back.  Placing the sticky side up I sprinkled glitter all over the die cut.  The glitter attached to EVERY spot of the diecut and did not come off.
I ran the die cut through the Creative Station again (glitter side UP!) to get perfect adhesive coverage on the back of it so I could attach it to the ornament base that I cut from neutral cardstock.  After assembling the ornament, I added some rhinestones and pearls before adding to the tag:


Next, I have a card using glitter again.  I created the card base by adhering the patterned paper to the card using the Mega Runner.  After I die cut the tree image (Samantha Walker: 3 Christmas trees: Silhouette), I ran it through the Creative Station one time to add the glitter.  Then, I used the Glue Stick to adhere it to the card base.  Then, I added the glitter tree on top using foam tape to get some dimension. I am lovin' the glittery tree!:

Here is another very ornate die cut image that I cut using my Silhouette (Birds on a Branch by Hero Arts) that I have avoided using because I didn't want to try to add liquid adhesive to the back of every leaf and I was sure a tape runner would rip it.  It was simple using the Creative Station:
Finally, here is another quick card using an intricate snowflake die (from The Cat's Pajamas), sentiment from Simple Snowflakes (Gina K Designs).  The snowflakes were run through the Creative Station and then added to the card:

Head on over to these blogs to see what the rest of the Cardmaker girls made with their Xyron products:
Cardmaker Blog
Anya
Colleen
Glenda
Jennie
Trudy

Thanks to Xyron for the wonderful products featured on today's post!  Thanks for stopping by!

Wednesday, October 17, 2012

Metallic Inspirations- CardMaker Blog Hop

Hi there!  It's time for the monthly CardMaker Blog team hop. The theme is Metallic Inspirations---create a card that is shiny and sparkly. You can use mirrored card stock, glitter, metallic finished, etc.---anything that is metallic and shiny. Cards can be any occasion.

Here is my metallic, shiny, glittery mirrored, sparkly creation:

And here is a picture of the card lying down so you can see some more of the glitter, sparkle, etc:

Took the challenge quite literally, eh!? 
Mirrored- check
Glitter- check
Sparkly- check
Shiny- check

I used some beautiful chipboard from This & That- Christmas collection (Echo Park) that I have been hoarding and layered it on some fabulous paper I found.  It is pretty cool...it's mirrored and then has circular glitter circles.  (Cool, but hard to photograph!)

I used an SRM sticker from Fancy Sticker Sentiments- Christmas for the sentiment and I added a silk ribbon that I gathered with a piece of cord and then added a glittery sparkly snowflake with an extra rhinestone center on top.  I added another rhinestone to the first reindeer's nose (Rudolf!) and to the sentiment .  Finally, I punched a corner from a glittered area of the card stock to add to the corner of the sentiment.

Supplies: Sentiment- Fancy Sticker Sentiments- Christmas (SRM Stickers); Chipboard Accents- This & That Christmas (Echo Park); Patterned paper- This & That: Christmas- Poinsettias, Red (Echo Park Paper); Speciality paper- Metallic foil -Recollections (Michael's); rhinestones- Recollections (Michael's)- Snowflake bling- Jolee's (EK Success).
Cannot wait to get a gander at what my awesomely talented teammates came up with:
CardMaker Blog
Anya
Colleen
Glenda
Jennie
Kimberly
Trudy

Enjoy the hop! Be sure to check in tomorrow for my first "clean-out-the-office-or-bust" giveaway!

Thanks for stopping by!

Tuesday, October 16, 2012

I'm a.......Calendar Girl :)

...and I didn't have to stuff myself into a tiny swimsuit either :) (which is probably best for all involved!)

The Cardmaker 2013 Calendar is available for sale and I am so proud to be included in this gorgeous calendar along with the rest of the CardMaker blog team.  

My months are March and July.  Here is March, which features SRM stickers, The Twinery baker's twine, and Jillibean Soup paper and sprouts:

The glossy full color calendar includes 12 fun card projects featuring step-by-step instructions!  It's the perfect gift for any CardMaker on your holiday shopping list!

You can order it HERE.

Be sure to stop in tomorrow for a CardMaker Blog team hop and later in the week for a giveaway!

Thanks for stopping by!

Wednesday, October 10, 2012

U Inspire Me

I have a U Inspire Me post up on the Cardmaker Blog today.  Check it out to see how a fun pair of shoes inspired this shaped Halloween card:


You can find the post HERE!
Thanks for stopping by!